Opc UA Client
Deskval Workbench has 3 Opc UA Clients
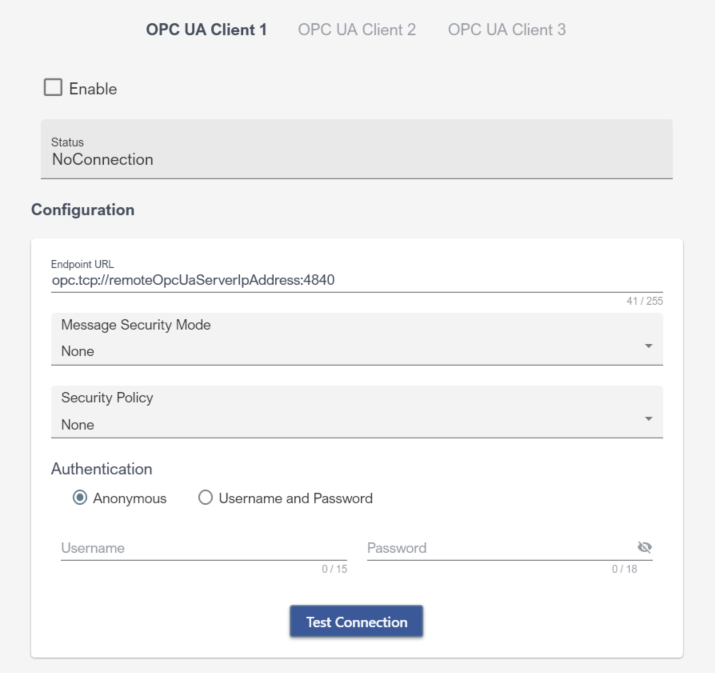
Deskval Workbench offers 3 Opc UA Clients. Each Client can be configured to communicate with a target Opc UA Server.
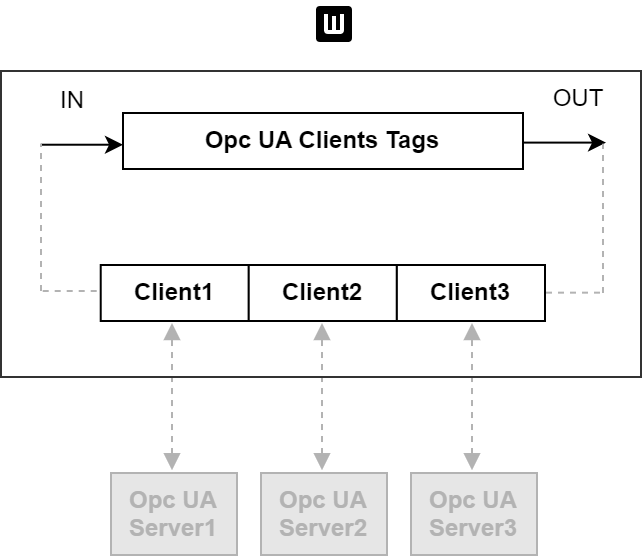
Deskval Workbench Opc UA Client System
Deskval Workbench Opc UA Client Tags
All Opc UA Clients of Deskval Workbench, shares a common Tag pool, so called Opc UA Client Tags, and is symbolized with ![]() . Each Opc UA Client Tag needs to be separately configured, to link to a target Opc UA Server item.
. Each Opc UA Client Tag needs to be separately configured, to link to a target Opc UA Server item.
|
Deskval Workbench Opc UA Client Tags |
Description |
||||||||
|
|
|
||||||||
|
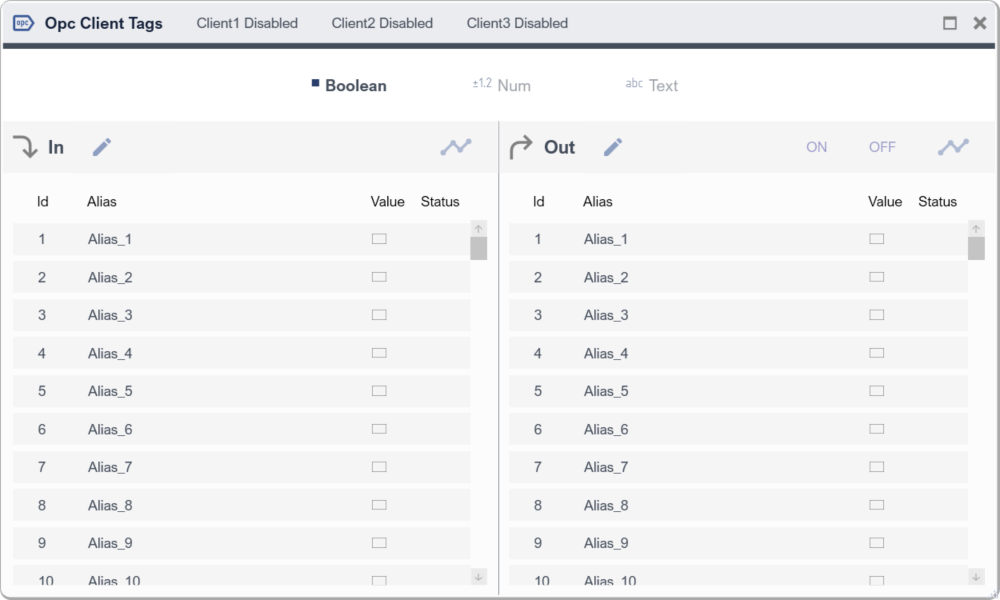
Output |
|
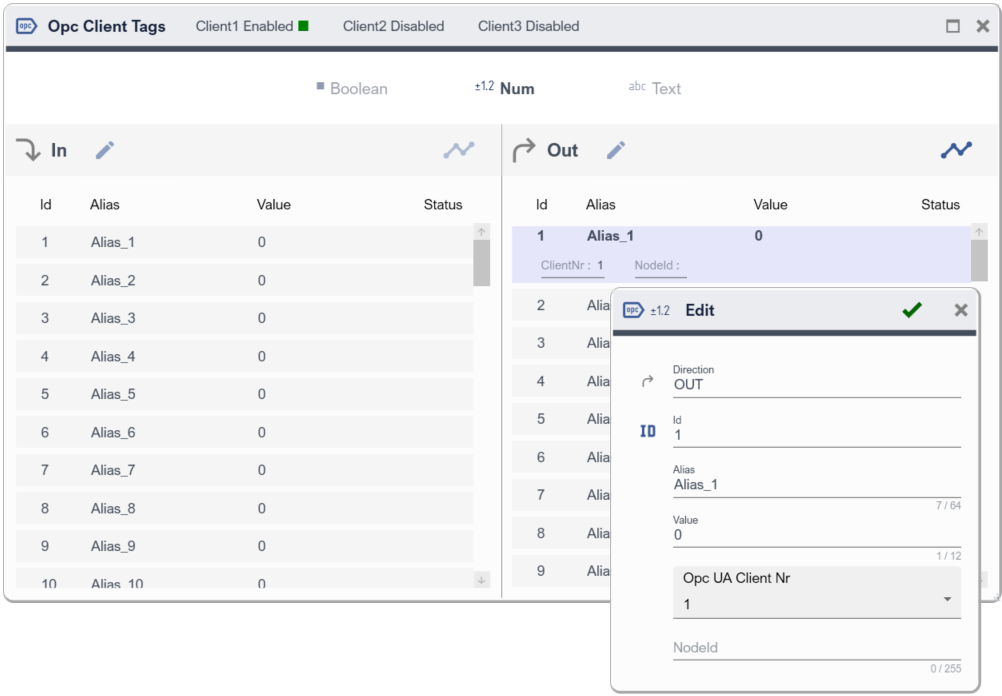
Opc UA Client Tags
|
|
Opc UA Clients Tags are shared across the Clients, thus each Opc UA Client Tag needs to be separately configured, to link to a target Opc UA Server item. |
Setting up a Deskval Workbench Opc UA Client Tag Linkage
|
|
Check our YouTube channel for explanatory videos https://www.youtube.com/@Deskval |
Assume, we want to link Opc UA Client Tag Out Num 1 to an Opc Server who has a Double typed tag with RW permission.
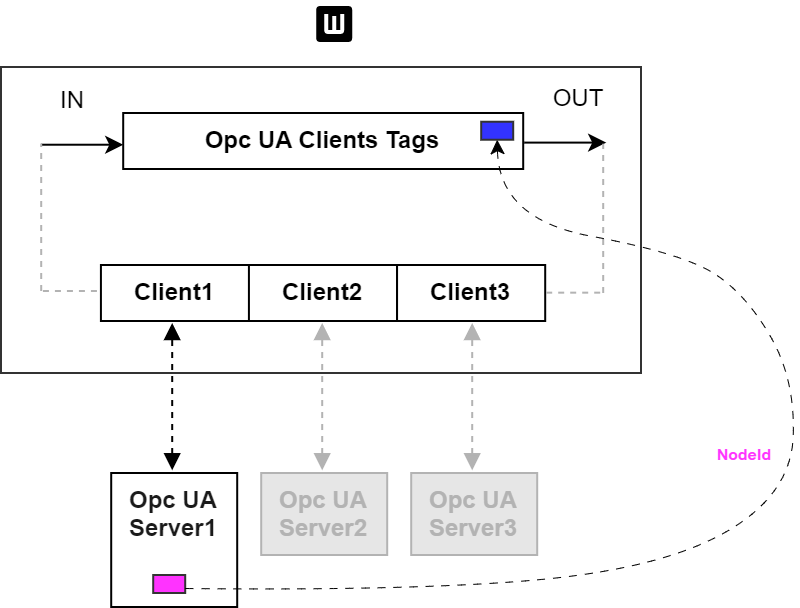
Example scheme - Link an Opc UA Client Tag Out Num 1
- Configure the Client to connect to a Target Server
|
Go to Settings > Opc UA Client |
|
Select and Configure your Opc UA Client ( in this example Client1 ) to connect to a Opc UA Server |
|
Note that the configuration will be active after application restart. |
- Configure the Client Tag to Server Target item
|
Go to IO Communication > Opc UA Client |
|
Select your Opc UA Client Tag ( in this example Num1 ) |
|
Open the Edit dialog and Configure your Opc UA Client Tag ( in this example Num1 ) |
|
Note that , you should refer the target Opc UA Server to learn the NodeId of that target item. |